About Me

My photo
Hey Ya'll I'm Rachel I'm a "Southern Girl" with a passion for writing, cooking, crafting and running. Three of the most important things in my life are my, handsome guitar playing, husband Stephan our hilarious genius child Ephraim Brite and our beautiful girl Wren Eisley Take a look around and get to know me!
Showing posts with label Homemade. Show all posts

Thursday, July 26, 2012

Happy Birthday Hubs

Monday was the hubs 26th birthday.
He says it's just one more year closer to 30, that he's just getting old. I think he's silly. 26 is young and so is 30. I am just thankful for another year we get to spend together!

While I was antique shopping in the mountains I found this store, that reminded me of a place you'd see on American Pickers. I was about to walk out the door after buying two mason jars when I saw this Avengers poster. The guy told me its from 1970. I didn't really care how old it was, I just knew Stephan would like it so I bought it for $30 and brought it home.

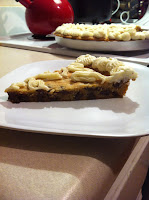
One of Stephan's only requests for this birthday was for us to make cookie cake. When we were dating we used to make and decorate a cookie cake, probably monthly. Back then we would buy a tub of cookie dough, put it in a round pan, add food coloring to store bought icing, and decorate our cake. Now that we're a little more skilled in the kitchen, Steph wanted us to make one from scratch. 
This is how it turned out:
The decorating is a little rough.... but it was going on 9pm and we were really just ready to eat a piece.
He seems happy with it :)
This might be the first picture we've taken together since February. Don't judge...
He said he didn't smile for real because there was chocolate in his teeth. 

Last night the celebration continued...
We went to see The Dark Night Rises. 
Which if anyone hasn't seen it yet, you should. Amazing movie!

After the movie we went to my favorite sushi place (yes I know it's his birthday celebration but he let me pick dinner bc he loves me so much), Rock and Roll Sushi. It was wonderful as usual.

While we were there we took a picture to send to my cousin in California, who was texting me. He didn't want to take a picture, so this is how it turned out. Cute huh?

I hope he had a great birthday!
I love you hunny! :)

Tuesday, July 17, 2012

Adventures of D and V: A guest post

Hi there! I'm Veronica (the "V" in Adventures of D and V) and I am beyond thrilled to be Rachel's guest poster today. The "D" is for Daniel, my amazingly wonderful husband of 2 years and my best friend. Our lives have been one adventure after another since we met. 


(The best day of our adventure thus far, our wedding day!)


Together we are pretty much the ultimate DIYers.


From cooking to crafting,

home improvement to home renovation

we like to do things ourselves!

At the moment we have undertaken the huge task of finishing our basement.

Well, not JUST finishing...

Take a look {HERE} for more details on our Operation: Finish Basement


Today I am going to share with you one of my most favorite and most frequently used recipes:


How to make your own granola bars! 

Daniel loves granola bars and could eat a whole box if given a change. And to be honest, those little buggers can be expensive! So I set out to learn how to make my own. 

This recipe is very flexible. Our favorite flavor combination so far has been:


Here is the basic recipe I start off with: 1 can of sweetened condensed milk, 2 c. oats (we use gluten free oats), 1/2 c. nuts (for this recipe I used chopped pecans), 1 c. dried fruit (I used cranberries), 1/2 c. white chocolate chips, 2 t. cinnamon.


Step 1: Pre-heat oven to 350 degrees.


Step 2: Mix all ingredients together


TIP OF THE DAY: let your can of sweetened condensed milk sit in a bowl of hot water for a few minutes while you measure out the other ingredients. Doing this will make the mixing process MUCH easier!


Step 3: Using a spoon (or your fingers) lightly press the mixture into a parchment paper lined cookie pan, spreading it evenly. The bigger the pan you use, the thinner your granola bars will be. I like mine kind of a medium thickness so I use my smallest cookie pan.


Step 4: Bake them for 25 min at 350 degrees. If you like your granola bars a little more crunchy, you can leave them in for another 10 min, just watch that the top doesn't start to burn. 


Step 5: After your remove the granola bars from the oven, flip them over onto a cutting board and peel off the parchment paper. Let them cool for about 10 min on the cutting board before cutting them.


I have found that the easiest way to cut these into bar size is by using a pizza cutter! Don't wait until they are all the way cool to cut them because they will get a little stiff. 


And there you have it, home made granola bars!  I wrap my granola bars individually in plastic wrap to pack in our lunches. Like I said before you can add or leave out any kinds of nuts and dried fruit. I will even melt some peanut butter to mix in with the sweetened condensed milk just to change things up a bit. 


I would love to know your favorite granola bar flavor combination! I am always looking for new ideas. Jump on over to Adventures of D and V and let me know what you think!


Thursday, June 21, 2012

That's so Pinteresting

I am so very sorry about the lack of posts the last 5 few days. I have missed the old blog!
Brief synopsis of the past few days:
Ephraim has been sick. We went to Cracker Barrel with all the extended family (on my moms side) on Saturday for a fathers day breakfast. When we got there Ephraim proudly walked through the front doors. Stephan and I went off on our "secret adventure" while E stayed with my parents. I promise there will be more to come on our "secret" as soon as we have all the loose ends tied up! After our adventure we picked up E and we were off to our nieces 4th birthday party. By Saturday night I had completely lost my voice. It was awful.  Sunday E was still sick so he gave Stephan some pretty special fathers day cuddles, or maybe it was the other way around. I slowly regained the ability to talk but still sound froggie. We had to take our little man back to the doctor Tuesday because he wasn't getting any better.... 
Diagnosis: Double ear infection.

I'm so ready for my little to feel better. It breaks my heart when he is sick! Here's to hoping we both get back to normal soon.

When I'm sick I find myself filling up my pin boards, on pinterest, a lot more than usual
Here are a few of my new favorites:
This fun table will be one of the first things I try my hand at when I start refinishing furniture
from this...
to
this!


via: Nine Red

I adore this color scheme. This will be the scheme for our bedroom

I found this
and made it yesterday. It's supposed to help boost weight loss and just be a general cleansing drink. Perfect for being sick right?! It is SO yummy and refreshing. 

I think this next one is one of my all time favorite ideas I've ever found on pinterest.
The date night jar via: Life in the Green House
The red sticks are ideas that cost $$$ and require some planning, the white sticks are stay at home dates, and the pink cost $ and are spontaneous. I mean how fun is that?! Everyone should go check out the blog I found this on. She has some great ideas.

and I will leave you with one of the cutest things I have ever laid eyes on:


I hope everyone has a wonderful Thursday! I'm feeling much better today so no more slacking on the blogging.


Thursday, April 26, 2012

Chicken Alfredo Pizza with Spinach and Red Onion

A few nights ago Stephan and I tried out a recipe (Chicken Alfredo Pizza) I found while searching foodgawker. If you haven't joined this site you totally should. We find better recipes there than we do on pinterest. This pizza was from the Sweet Pea Chef. Her blog is great and I'm looking forward to trying many more of her recipes! The pizza turned out to be so yummy that I figured it would be rude not to share it! So to start off I want to make a quick and easy grocery list of things you'll need for this meal. I'm excluding things like milk, butter, sugar, salt, pepper because these are things most people have on hand all the time. If you don't just check the recipe for how much you'll need of each before you go shopping!
Grocery List
*Bread Flour
*Yeast
*Garlic
*8oz Cream Cheese (I use low fat)
*8oz Parmesan Cheese
*1lb Boneless Skinless Chicken Breasts
*2 Small Red Onions
*2c Baby Spinach
*8oz Fresh Mozzarella (this was surprisingly cheap!) 

It's a pretty simple shopping list for this meal! The best part about it, is that it makes two large pizzas. Yay for leftovers! So here is the recipe... Starting with my go to pizza dough. Nothing fancy, just the one that came with my bread maker.
Easy Pizza Dough
*1c hot water (90-110 degrees)
*3c bread flour
*1tsp salt
*1tbsp sugar
*2 tbsp olive oil
*2tsp yeast
Add the hot water to your bread maker, Add all other ingredients except for the yeast, Dig a small well in the center of the bread pan and add the yeast to the well you made. Set your bread maker to dough and wait 'til it's done!
If you don't have a bread maker here is a easy recipe you can use instead! 

Now for the sauce. With about 20 mins left on your dough go ahead and start prepping the other parts to your pizza.

Garlic Alfredo Sauce
*1 stick of unsalted butter
*6 cloves of garlic, finely minced (I grated mine with a microplane)
*8oz low fat cream cheese, at room temp and cut into cubes
*2c milk
*6oz parmesan cheese, grated (fyi: it's cheaper to buy a block and grate it yourself)
*1tsp pepper
*Salt to taste
Melt butter in a medium sauce pan over medium heat. When butter is melted add garlic and cook until you can smell it (about 2 mins). Add cream cheese stirring with a whisk until melted. Add in the milk a little at a time, whisking until smooth. Add the parmesan, pepper and salt, to taste. Let the parmesan melt and cook on low until the sauce reaches the texture you would like. It took mine about 10 mins to get to a texture that it wouldn't just spill off my pizza crust.

Chicken
*1lb boneless skinless chicken breast
*salt
*pepper
*2tbsp olive oil
Heat oil in a large skillet. Trim fat off chicken. Cut chicken into cubes and season with salt and pepper. Cook chicken in skillet over medium heat until seared on the outside. (It will finish cooking in the oven)
Set chicken aside and let cool.
Onion and Mozzarella 
*2 small red onions
*8oz fresh mozzarella
Peel your onions. Cut them in half and then into thin slices. Set aside for later.
Using a sharp wet knife cut your mozzarella into thin slices and set aside for later.

**Make sure to preheat your oven to 400 degrees**

When you pizza dough is done sprinkle your pizza stone, or round pizza pan, with a little corn meal. Split dough in half (because remember you're making TWO pizzas). Roll out half of the dough. Now you're ready to assemble your pizza!
Spread your alfredo sauce onto the pizza crust, leaving about 1in for the crust. Lay half of your spinach leaves on the pizza. Spread half the onions and half the chicken cubes on the pizza. Top the pizza with half of your mozzarella slices. I also topped my pizzas with what I had left of my grated parmesan from the sauce. Put your pizza into your preheated oven and cook for 10-15 mins. You should have something like this when your oven timer goes off

 Let it cool for about 2 mins and then...

Bon Appetit 

Thursday, August 25, 2011

No bread maker required

Once again I am blogging from my phone. This really is getting annoying. I miss adding picture to my posts and typing on real keys instead of the touch pad where I am constantly missing letter and what not. Oh the woes!


For some reason I was in the mood to completely destroy my kitchen this evening, um I mean bake. On our meal list for next week is homemade pizzas which meant that I finally had a good reason to buy some bread flour. Before making pizzas I wanted to try my hand at homemade bread. I found this recipe here http://afoodiestaysfit.com/2011/01/my-moms-famous-white-bread/ and for my first attempt and no stand mixer to use it taste fabulous! I posted a picture on Facebook of my first loaf and I will post an entire post of pictures as soon as I get a computer! My loaf sure doesnt look as pretty as her's do, but practice makes perfect I guess. It also took me longer to make my dough because I am still in need of a stand mixer and was using my hand mixer. It conveniently came with small puney bread hook attachments when we purchased it. Thank goodness or it would have been nearly impossible for me to make. My bread never rose to the top of the pan when I let it sit but I decided to stick it in the over anyways (mainly bc I'm impatient) and it turned out just fine! Okay so yummy bread everyone should try it! I am making whole wheat next time though for a healthier option, and because Stephan prefers it.

After the bread, or actually during the time the bread was rising, I made cookies. Really amazing sugar cookies. I found the recipe for those here http://caleighskitchen.com/2011/07/13/nannys-sugar-cookies.aspx These cookies have one ingredient I never would have thought to add to a sugar cookie and that's the dusting of nutmeg on top right before baking. I honestly almost omitted that all together but I figured why not try. Good decision because they are delicious!! The recipe called for lemon zest in the cookie but we didn't have any lemons and I didn't feel like getting Ephraim in the carseat to go out for one little lemon but the batter tasted a little too bland without it so I added a little vanilla extract, about 2tsp. The vanilla added a little something without overpowering the cookie. Good decision! I baked mine for 9 1/2 mins and they came out perfection! Not too hard but not too soft either. The recipe made 3 dozen so we shared some with the sweet old lady who lives next door! Ephraim loved visiting with her and so did I. I'm thankful for such a sweet neighbor in a neighborhood filled with some crazies!